Gleaming Christmas

GleamingChristmas_Pic

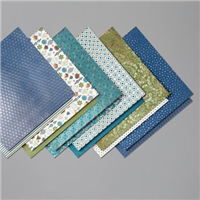
Weeeeeeeee! Another sneak peek of product from the Mini Catalogue which launches next week! Some of you may recognise the paper I have used in this project and that’s because it carried over from last year!

I absolutely adore this paper, every single pattern in the pack is gorgeous and I bought so much of it last year and used it for practically every gift I made boxes for. This year, I decided to make a box and mix it up with some other sets available. This box was made for my work colleagues last year, it housed trophies for award winners who had gone that extra mile for our customers.

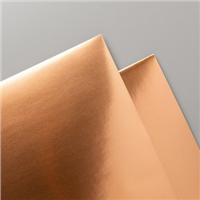
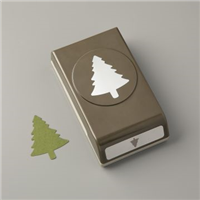
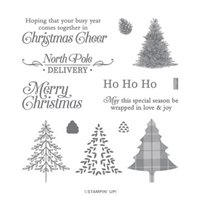
The box is made up of two sections, the copper foil inner section and a wrap on the outer made from the Brightly Gleaming Speciality Designer Series Paper (DSP). I decorated the box with a copper foil tree using the Pine Tree punch and finished with touches of Night of Navy in the sentiment and ribbon.

It makes a gorgeous box and an item I would love to receive if made by someone else.

Best Wishes,
Suzanne

Colours Used:

Colors

Measurements:

  • Designer Series Paper (DSP) = 111/2 x 21/4 inches
  • Copper Foil = 61/2 x 91/2 inches

Scoring:

  • Long Side (91/2): 21/4, 41/2, 63/4, 9 inches
  • Short Side (61/2): 21/4, 31/4 inches

Supply List:


Cylindrical Treat Box

cylindrical_christmas

It’s not often that you see a Cylindrial box, in the almost 5 years that I have been a demonstrator with Stampin’ Up! I have seen plenty of cuboid, cubes, slopey lids, hexagons, octagons etc but very rarely have I seen a cylinder.

I like to challenge myself every now and again, so decided it was time to see if I could bring one together that could be replicated dozens of times. I’m happy to say that I think I’ve achieved this and not only is today’s project a cylindrical box, it is a flush lidded cylinder box.

The treat box uses one of the larger circles from the Layering Circles dies to help form the base and the lid, with a technique shown in my video to help curve the card and stop it from kinking. The box in the video is a Halloween version, but I just love the Christmas one in the photo above too.

The below tutorial was filmed during my TFI Crafty Friday Facebook Live, in which some of the measurements I listed were for a different size box.  To make a box the same as the image above you will need to follow the measurements lower down on this post.

Please have a go at making your own and if you have instagram, please tag them with #yourfavouriteyorkshiredemo or #hullahbaloo so that I can come see them!

Enjoy!

Best Wishes,
Suzanne

Measurements:

  • Cardstock:
    • 1 piece = 85/8 x 21/2 inches
    • 1 piece = 85/8 x 13/4 inches
    • 1 piece = 811/16 x 11/4 inches
  • Designer Series Paper:
    • 1 piece = ½ x 811/16 inches
    • 1 piece = 1½ x 811/16 inches
  • Die Cuts:
    • 4 circles = 23/4 inches
    • 1 DSP circle = 21/2 inches

Scoring:

  • Score both the 85/8 x 13/4 and 811/16 x 11/4 inches at ½ inch on the short sides.
  • Then every ½ inch on the long side with the ½ inch section at the top.


Stars and Wishes

20181005_122037495_iOS

Merry Merlot and the absolutely gorgeous Joyous Noel Designer Series Paper (DSP) make another appearance on the blog today. They are both highly addictive craft materials and once you start, you just can’t stop crafting with them. This time I have teamed them with the amazing double sided Copper and Merlot ribbon & the Joyous Noel Glimmer paper. WOW!

The foiled snowflakes on this piece of DSP really set the card alive and I wanted them to be the main focus of this card. The only things I added were a small piece of ribbon to set behind my sentiment, punched out and bordered with Glimmer.

For the sentiment, I used the Flourish Filigree stamp set and fussy cut around the shape to allow a border of glimmer to peek from behind it. The double sided ribbon adds the final touches to the card.

Let me know what you think.

Best Wishes,
Suzanne

Supply List:

Merry Merlot Christmas

20181005_124926915_iOS

A very simple card on the blog today, one to make if you’re running out of time or perhaps want to mass produce them for family / friends. This card takes just 3 supplies plus ink and adhesive. Amazingly quick to make and can be reproduced in a number of colour ways!

I chose to showcase Merry Merlot, a lovely reddish purple colour which is just perfect for the Festive Season. Teamed with the Specialty Designer Series Paper, Joyous Noel – which features a gorgeous foiled effect.

To add a little ‘something’ to this card, I stamped my sentiment onto a piece of vellum. This not only added an extra layer and texture to the card, but it provided some masking of the background to make the wording stand out a little more. I absolutely love it!

Hope you have enjoyed this.

Best Wishes,
Suzanne

Supply List:

Many Merry Thanks

20181004_132759613_iOS.jpg

How gorgeous is the deer on this card? I couldn’t wait to use it when I first opened the stamp set but wasn’t sure what to do with it. Doing my usual browsing of Pinterest and other craft forums, I came across a card from a fellow demo Karen McClure using the Dashing Along Designer Series Paper (DSP). Unfortunately, the Dashing Along DSP was only available for a limited time as part of an offer in September, so I decided to make my own interpretation with products still available in the current catalogues.

Combining tone on tone with the beautiful die cut from the Detailed Deer Thinlits Dies is absolutely gorgeous and I think everyone would agree that the combination of Cherry Cobbler and Crumb Cake suits the festive season perfectly.

What do you think? Are you a fan of the deer?

Best Wishes,
Suzanne

Supply List: