Penguin Fun

PenguinFun_Pic

I love cute stamp sets, especially ones that I can colour in with my blends alongside my children. When the Autumn / Winter Mini Catalogue went live for demonstrators, my children flicked through the pages and immediately chose the ‘Freezin’ Fun’ stamp set used on this card as well as the ‘Have a Hoot’ and ‘Warm & Toasty’ stamp sets. They all have gorgeous outline images of animals which we can colour to our hearts content.

This card uses a great technique for creating your own backgrounds without the need for Designer Series Paper (DSP). Now don’t get me wrong, I love DSP – but sometimes you want to use something else or the papers don’t quite suit what you’re wanting to achieve.

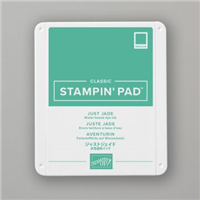
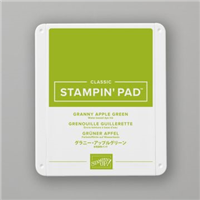
The background was achieved by choosing 4 different inks – on this occasion it was differing shades of blue to create a snow flurry sky effect. The snowflake stamp I used comes from the ‘Snowflake Wishes’ bundle, using versamark to stamp them randomly before embossing them with white powder.

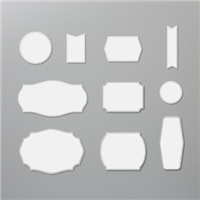
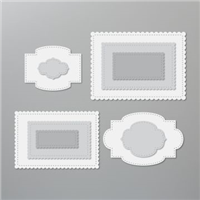
The ‘Freezin Fun’ stamp set forms part of the ‘Freezin’ Fun’ Bundle, which I absolutely adore as it means I can die cut each of the images to use on my projects. This card allowed me to showcase them perfectly against the blended ink background. The die set includes the stitched edge which forms the snowy hill on the background.

I absolutely love it and have made differing version already, one of which is shown in my video below. Hope you enjoy!

Best Wishes,
Suzanne

Colours Used:

Colors

Measurements:

  • Card Base = 41/8 x 111/2 inches, score at 57/8 on the long side
  • Background Layer = 37/8 x 55/8 inches
  • Stitched Snow Layer = 37/8 x 2 inches
  • Scraps of Whisper White for stamping.


Cylindrical Treat Box

cylindrical_christmas

It’s not often that you see a Cylindrial box, in the almost 5 years that I have been a demonstrator with Stampin’ Up! I have seen plenty of cuboid, cubes, slopey lids, hexagons, octagons etc but very rarely have I seen a cylinder.

I like to challenge myself every now and again, so decided it was time to see if I could bring one together that could be replicated dozens of times. I’m happy to say that I think I’ve achieved this and not only is today’s project a cylindrical box, it is a flush lidded cylinder box.

The treat box uses one of the larger circles from the Layering Circles dies to help form the base and the lid, with a technique shown in my video to help curve the card and stop it from kinking. The box in the video is a Halloween version, but I just love the Christmas one in the photo above too.

The below tutorial was filmed during my TFI Crafty Friday Facebook Live, in which some of the measurements I listed were for a different size box.  To make a box the same as the image above you will need to follow the measurements lower down on this post.

Please have a go at making your own and if you have instagram, please tag them with #yourfavouriteyorkshiredemo or #hullahbaloo so that I can come see them!

Enjoy!

Best Wishes,
Suzanne

Measurements:

  • Cardstock:
    • 1 piece = 85/8 x 21/2 inches
    • 1 piece = 85/8 x 13/4 inches
    • 1 piece = 811/16 x 11/4 inches
  • Designer Series Paper:
    • 1 piece = ½ x 811/16 inches
    • 1 piece = 1½ x 811/16 inches
  • Die Cuts:
    • 4 circles = 23/4 inches
    • 1 DSP circle = 21/2 inches

Scoring:

  • Score both the 85/8 x 13/4 and 811/16 x 11/4 inches at ½ inch on the short sides.
  • Then every ½ inch on the long side with the ½ inch section at the top.


Derwent Pencil Box

20200712_074617477_iOS 1

Hello everyone, hope you are having a good weekend! Thank you to everyone who joined me on my Facebook Live yesterday, where we made a birthday box for a set of Derwent Pencils. This gorgeous box fits a tin of 6 Derwent pencils, a lovely gift for any occasion.

This project heavily features the Playing with Patterns suite using the Designer Series Paper, a ribbon from the combo pack & the Resin Dots. I kept the box simple, letting the decoration speak for itself. The paper pattern I chose allowed me to use one of five colours, so I went with Coastal Cabana.

The ‘Happy Birthday’ sentiment from the Many Mates stamp set fits nicely into the 2″ circle, leaving room for some embellishments and a pretty to finish off the decoration. My daughter was very pleased with the end product, gifting the box to one of her friends.

What do you think?

Best Wishes,
Suzanne

Colours Used:

Colors (4)

Measurements:

  • Cardstock = 111/4 x 71/4 inches
  • Designer Series Paper = 2 pieces 41/4 x 23/8 inches
  • Scraps of Coastal Cabana & Whisper White for the sentiment

Scoring:

  • Long Side (111/4”): ½, 11/4, 10, 103/4 inches
  • Short Side (71/4): ½, 11/4, 37/8, 45/8 inches

Supply List:


After Eight Teacher

20200705_172401369_iOS

How is already that time of year? Schools are getting ready to break up for the six weeks of summer (for those year groups that have been able to return following Covid-19 closures). For my eldest son, this is his last year in Primary School and he moves onto the scary world that is High School from September. Even though he will have only been back mere weeks, he wanted to get his teachers something to say ‘thank you’ and ‘goodbye’.

Inside these boxes are 10 After Eight chocolates, just the right amount to say thank you to each teacher without overloading them to the point they need a gym membership to work off the extra pounds gained from end of year gifts.

My son chose the Whale of a Time paper stack and a fish pattern in Shaded Spruce – which works well as the After Eight’s choc box is also a dark green. At first we tried stamping and colouring in the apple from Harvest Hellos with Stampin’ Blends, but something just didn’t quite sit right. A quick look on Instagram showed lots of stampers embossing their apples on coloured card stock, which has worked brilliantly on these boxes.

Finished off with a little note inside & a bow of ribbon on the front, these are gorgeous little teacher gifts without breaking the bank. My son can’t wait to give these to his teachers on the last day of school!

Where is this year going?

Best Wishes,
Suzanne

Colours Used:

AfterEight

Measurements:

  • Cardstock = 77/8 x 9 inches.
  • Scrap of cardstock for the stamped apple.

Scoring:

  • Long Side (9″): ½, 21/2, 43/4, 63/4 inches.
  • Short Side (77/8″): ½, 23/4 inches on both sides.

Supply List:


Camo Love

20200612_195235671_iOS

Thank you to everyone who took the time to watch my Facebook Live on Friday evening. As promised, here is the blog post to accompany the project we made.

Whenever I scour a new Stampin’ Up! catalogue, there are items which immediately jump out to me and set ideas going in my head. The camouflage background stamp immediately got me thinking about cards for male recipients – they are one of my biggest challenges.

Originally, I made this as part of a challenge set in the Stampin’ Up! team that I am part of – we had to use the three colours Magenta Madness, Misty Moonlight & Balmy Blue (with only white or black as additionals). This is what I came up with!

As part of my TFI Crafty Friday, I demonstrated how to make this card and used a different colour way – Just Jade, Cinnamon Cider & Granny Apple Green.

**This video was streamed live on Facebook and has not been edited**

Measurements:

  • Card Base = 41/8″ x 113/4″ inches (scored at 57/8)
  • 1st Layer = 37/8″ x 55/8″ inches
  • Stamped Layer = 35/8″ x 53/8″  inches

Colours used:

CamoLove1

CamoLove2

Supply List: