September Goodies!

Three great goodies are coming your way in September!

  1. Starter Kit Promotion
  2. My Birthday Party Live Week
  3. Stampin’ Cut & Emboss Machine

Starter Kit Promotion

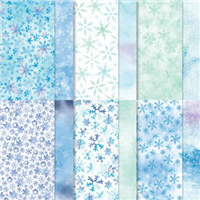
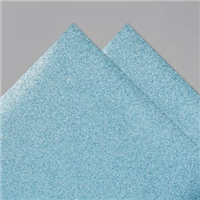
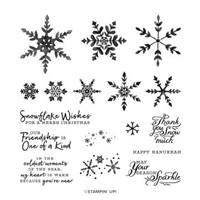
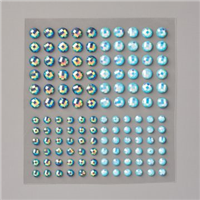
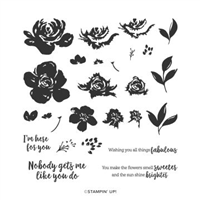
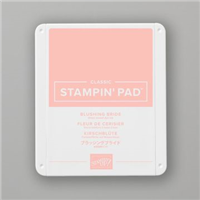
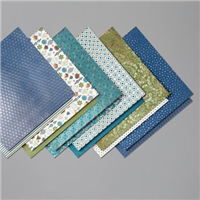
This new promotion has been designed to give any new members who sign up in September a kick start into their Stampin’ Up! demonstrator life, giving additional product to get started right away. The additional product includes pre-cut paper, two stamp sets, and embellishments but is only offered for a limited time.

So, if you join my team in September, not only will you receive the above, you will also get £130 / 175 € of product for your starter kit and you shall also receive a business kit including catalogues!

My Birthday Party Live Week

From Monday 7th September, to celebrate my birthday, I shall be launching a special week of Facebook Lives. During this week, I will be live every day at 7:30 pm on my Facebook page – click here to view my page. I will cover a variety of projects including Fancy Fold, 3D boxes, bags and cards. Please feel free to join me live where I shall be answering any questions put to me – or you can watch them back afterwards, as all videos shall be uploaded onto my Youtube channel. There will also be a giveaway – more details for this will be explained in due course!

Stampin’ Cut & Emboss Machine

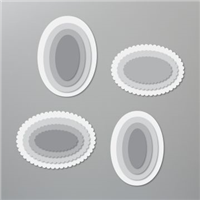
It has been known for a little while that Stampin’ Up! were working on a new die cutting machine and it is well worth the wait! From 1st September, you will be able to get your hands on your very own machine. It’s very easy to use, allowing intuitive die-cutting and embossing. All plates are labelled with a number for easy reference when building a sandwich.

The machine is light (1.22kg / 2.7lbs) and convenient to craft on the go – the platforms fold in to make transporting easy (and takes up less space when storing). When purchasing the machine, you get the plates required to get started, you will receive:

  • 1 Base Plate (Plate 1)
  • 1 Die Plate (Plate 2)
  • 2 Cutting Plates (Plate 3) and
  • 1 Specialty Plate (Plate 4)

So as you can see, some amazing things ongoing in September – which you can be a part of! Please don’t hesitate to ask me how.

Best Wishes,
Suzanne

Snowflakes One Sheet Wonder

SnowflakeOSW_Pic

Gotta love a One Sheet Wonder, you get to make gorgeous cards with beautiful paper and only use a single sheet of it, meaning you have loads left for other projects! The paper in this One Sheet Wonder is from the Snowflake Splendor Designer Series Paper (DSP), it has gorgeous set of colours – nothing too traditional and looks almost inspired by the film, Frozen. Absolutely gorgeous.

To make this One Sheet Wonder, I cut my DSP into three 4 inch strips. Then I cut at every 31/2 inches down each strip resulting in 3 pieces of DSP ready for your card fronts. I backed mine onto a layer of Misty Moonlight and then onto a card base of Thick Whisper White cardstock.

Finally, I added a gorgeous sentiment using Balmy Blue Glimmer paper and finished them off with the Blue Adhesive-Backed Gems. I’m really pleased with the results and have found a very quick way to make customer thank you card for any future shoppers.

Best Wishes,
Suzanne

Colours Used:

Supply List:

Blends Gift Box

FloralPenBox_Pic

I am absolutely loving my TFI Crafty Friday Lives – it’s nice to be online, crafting with like minded friends sharing ideas and inspiration. Hosted on Facebook at 7:30 every Friday, I bring a new project and showcase the items used to make it. Yesterday, I made this gorgeous gift box which holds 10 Stampin’ Blends pens.

I was inspired by the amazing Helzie over @ SlimmandStylish.com who used the ‘All Things Fabulous’ stamp set during a Youtube Live. It was a set that I had skipped past when I looked through the catalogue and hadn’t really paid much attention to it. Then I saw Helzie use it and immediately loved the dimension you get from the triple stamping.

It’s an amazing set to use to make your own version of Designer Series Paper (DSP) and you get a different result every time and because they’re stamps, you can change up the colours as you wish. As you’ll see on my video below – I switched the colours round to suit the feature colour of the box.

I love it – and the box is a great way to gift a set of blends (or other stationery) to a friend or family member.

Best Wishes,
Suzanne


Colours Used:

Colors

Measurements:

  • Lid and Base = 81/4 x 73/4 inches
  • Coloured Cardstock for Lid = 6 x 61/2 inches
  • Whisper White for Lid = 61/4 x 53/4 inches

Scoring:

  • Base and Lid = ¾ on all sides (using a shim for the lid piece)

Supply List:


Gleaming Christmas

GleamingChristmas_Pic

Weeeeeeeee! Another sneak peek of product from the Mini Catalogue which launches next week! Some of you may recognise the paper I have used in this project and that’s because it carried over from last year!

I absolutely adore this paper, every single pattern in the pack is gorgeous and I bought so much of it last year and used it for practically every gift I made boxes for. This year, I decided to make a box and mix it up with some other sets available. This box was made for my work colleagues last year, it housed trophies for award winners who had gone that extra mile for our customers.

The box is made up of two sections, the copper foil inner section and a wrap on the outer made from the Brightly Gleaming Speciality Designer Series Paper (DSP). I decorated the box with a copper foil tree using the Pine Tree punch and finished with touches of Night of Navy in the sentiment and ribbon.

It makes a gorgeous box and an item I would love to receive if made by someone else.

Best Wishes,
Suzanne

Colours Used:

Colors

Measurements:

  • Designer Series Paper (DSP) = 111/2 x 21/4 inches
  • Copper Foil = 61/2 x 91/2 inches

Scoring:

  • Long Side (91/2): 21/4, 41/2, 63/4, 9 inches
  • Short Side (61/2): 21/4, 31/4 inches

Supply List:


Cylindrical Treat Box

cylindrical_christmas

It’s not often that you see a Cylindrial box, in the almost 5 years that I have been a demonstrator with Stampin’ Up! I have seen plenty of cuboid, cubes, slopey lids, hexagons, octagons etc but very rarely have I seen a cylinder.

I like to challenge myself every now and again, so decided it was time to see if I could bring one together that could be replicated dozens of times. I’m happy to say that I think I’ve achieved this and not only is today’s project a cylindrical box, it is a flush lidded cylinder box.

The treat box uses one of the larger circles from the Layering Circles dies to help form the base and the lid, with a technique shown in my video to help curve the card and stop it from kinking. The box in the video is a Halloween version, but I just love the Christmas one in the photo above too.

The below tutorial was filmed during my TFI Crafty Friday Facebook Live, in which some of the measurements I listed were for a different size box.  To make a box the same as the image above you will need to follow the measurements lower down on this post.

Please have a go at making your own and if you have instagram, please tag them with #yourfavouriteyorkshiredemo or #hullahbaloo so that I can come see them!

Enjoy!

Best Wishes,
Suzanne

Measurements:

  • Cardstock:
    • 1 piece = 85/8 x 21/2 inches
    • 1 piece = 85/8 x 13/4 inches
    • 1 piece = 811/16 x 11/4 inches
  • Designer Series Paper:
    • 1 piece = ½ x 811/16 inches
    • 1 piece = 1½ x 811/16 inches
  • Die Cuts:
    • 4 circles = 23/4 inches
    • 1 DSP circle = 21/2 inches

Scoring:

  • Score both the 85/8 x 13/4 and 811/16 x 11/4 inches at ½ inch on the short sides.
  • Then every ½ inch on the long side with the ½ inch section at the top.