Birthday Party Live – Project #4
Yesterday was my birthday, so I had to make sure the project done on my birthday was a special one. Neverending cards have been around for some time – they’re certainly nothing new BUT I have never tried to make one myself, so what better occasion?
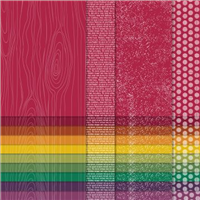
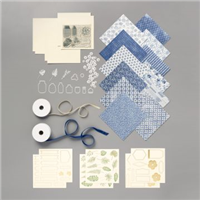
I went for one of my favourite colours for the first one – Cherry Cobbler and teamed it up with the Regals 6″x6″ Designer Series Paper stack. This alone gave some nice texture / difference on the differing sections of the card. To decorate it, I used a multitude of dies available in my collection, stamping any sentiments or images with matching Cherry Cobbler ink.
The second one in the video below was made in exactly the same way, except this time I used Bermuda Bay card stock and Designer Series Paper. Now, I just have to overcome my addiction to making them then sitting there flipping them round and round and round again!
Keeps the children entertained too! Bonus…
** Don’t forget to take part in my Birthday Party Giveaway **
Good Luck!
Best Wishes,
Suzanne
Colours Used:

Measurements:
- Coloured cardstock (4 pieces) = 6 x 3 inches
- Whisper White (8 pieces) = 27/8 x 27/8 inches
- Designer Series Paper (8 pieces) = 23/4 x 23/4
- Whisper White (10 pieces) = 13/8 x 27/8 inches
- Designer Series Paper (10 pieces) = 11/4 x 23/4 inches
- Whisper White (8 pieces) = 11/4 x 11/4 inches
Scoring (cardstock only):
- Long side (6) = 11/2 inches on both sides
Supply List:
The below supply list only contains the items to make the card without decoration – you can of course use any sets you wish to decorate:


Thank You Wrap

Birthday Party Live – Project #3
At this time of the year, my thoughts turn to Halloween, Bonfire Night, Autumn and Christmas gifts. With Covid-19 having such a large impact on 2020, I have been producing many thank you gifts to my workplace team members for their help and assistance during these unprecedented times.
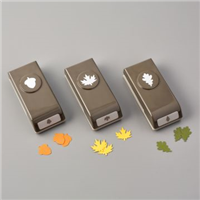
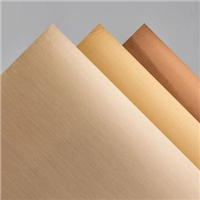
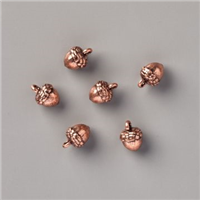
With this in mind, this project is a great gift to pass on your thanks. The outer wrap encases a small wine bottle – this one being a rose wine – and gives the bottle a more personalised touch. I went for an autumnal theme using the Gilded Autumn Designer Series Paper (DSP) and the co-ordinating punch pack. The acorn punch and trinkets are just the cutest things and look gorgeous on the finished project.
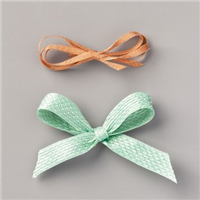
To finish off the bottle and taper the wrap around the neck, I’ve used a piece of metallic ribbon from the Basketweave and Metallic ribbon combo pack – which is utterly gorgeous! Have a go at making one yourself!
** Don’t forget to take part in my Birthday Party Giveaway **
Good Luck!
Best Wishes,
Suzanne
Colours Used:

Measurements:
- Cardstock = 7 x 71/4 inches
- Designer Series Paper (6 pieces) = 1 x 41/4 inches
Scoring:
- Long side (71/4) = 2 and 61/2 inches
- Short side (7) = 11/8, 21/4, 33/8, 41/2, 55/8, 63/4 inches
Supply List:


InColor Notes Part 2

Birthday Party Live – Project #2
Yesterday evening, the second of my Birthday Party Live events took place over on my Facebook page – if you missed the video, you can view this here on my blog or over on my Youtube challenge. Thank you to those of you who watched and showed your support, it is much appreciated.
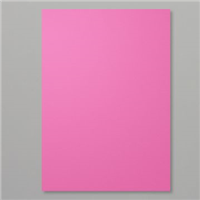
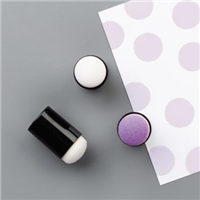
During my first live stream, we made 5 incolor notecards and I mentioned a box to house the notecards and their envelopes. Of the five colours to choose from, I went with Magenta Madness – as someone who doesn’t really like pink, this colour is amazing! To keep in with the theme of the cards, I decorated the front in the same design as the cards.
The notecards fit perfectly inside with their envelopes and make the perfect gift or craft fair item. With a switch of the sentiment, they could suit any occasion too!
** Don’t forget to take part in my Birthday Party Giveaway **
Good Luck!
Best Wishes,
Suzanne
Colours Used:

Measurements:
- Box Base = 91/4 x 63/8 inches
- Front Image = 3 x 3 inches
- Sentiment = 13/4 x 11/4 inches
Scoring:
- Long side (91/4): 1/2, 11/2, 47/8, 57/8
- Short side (63/8): 1/2, 11/2 (both sides)
Supply List:

InColor Notes Part 1

Birthday Party Live – Project #1
Yesterday evening, the first of my Birthday Party Live events took place over on my Facebook page – if you missed the video, you can view this here on my blog or over on my Youtube challenge. Thank you to those of you who watched and showed your support, it is much appreciated.
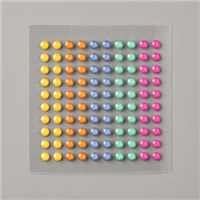
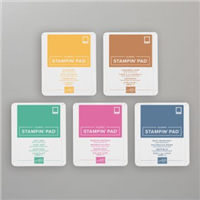
These incolor notecards came about from an idea my daughter had – a few weeks ago, I made a Penguin Winter Card using an ink technique, which she wanted to do again. However, with the small surface area that a notecard presents, she decided to use a single colour in a simple circle.
Together, we added a simple sentiment and finished them off with a resin dot. Keeping them simple and without using many resources.
** Don’t forget to take part in my Birthday Party Giveaway **
Good Luck!
Best Wishes,
Suzanne
Colours Used:

Measurements:
- Card Bases = 6 x 3 inches (5 pieces)
- Whisper White = 13/4 x 11/4 inches (5 pieces)
Scoring:
- Score all 5 card bases at 3 inches
Supply List:

Autumnal Thanks

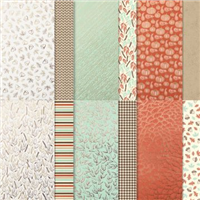
Who loves Autumn and the latter part of the year? I know I do. The colours, the cosy nights, the lead up to Christmas. The Gilded Autumn suite is a great hit of everything that’s gorgeous about that period. With gorgeous copper ribbon, brushed metallics and leafy patterns, the suite screams Autumn before you even read the title of it.
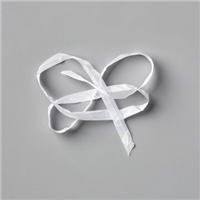
Yesterday, on my Facebook Live, I showed this gorgeous bag. Ideal for thank you gifts, table favours or perhaps treat bags full of goodies. The ribbon keeps the bag closed by wrapping back on itself – no punch holes required. Which means you don’t have to tie / untie it repeatedly either – score!
The bag is a good size too, 6 inches in height by 31/2 wide by 2 inches deep. Plenty of space to fit lots inside. The paper I used on the sample in the photo above is Mint Macaron, with the one in my video made using a Cajun Craze pattern. Both are stunning designs, which is why I chose to showcase them in the way I have.
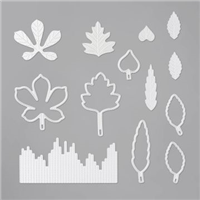
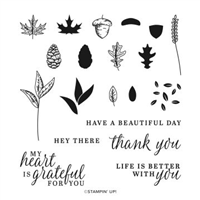
The fussy cut stitched leaf acts as a tag on the bag, whilst acting as decoration, it doesn’t take away from the gorgeous paper being used. The Stitched Leaves dies are utterly gorgeous and you’ll see them make more appearances on my blog!
Best Wishes,
Suzanne
Colours Used:

Measurements:
- Designer Series Paper = 111/2 x 10 inches.
Scoring:
- Long Side (111/2) = 2, 51/2, 71/2 and 11 inches.
- Short side (10) = 2 and 8 inches.
Supply List: