Golden Perfection

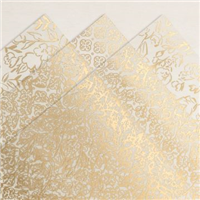
One of my favourite combos is Black and Gold and I absolutely love when I can bring all the co-ordinating items onto a single project like this one – ribbon, embellishments, embossing powder – all matching to really bring the box to light. The acetate acts as a slider on the box for added wow, which I love as it gives it a special something elevating it over any other box you may make.

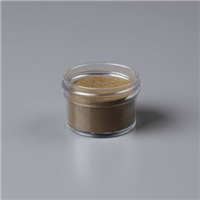
I don’t get my embossing powders out as often as I should, but powder is the only way to get that gorgeous look to the sentiment. Gold was the theme for the sample I made, but in my video I switched to Silver to show the variety the acetate brings – I’m not sure which one I prefer more!

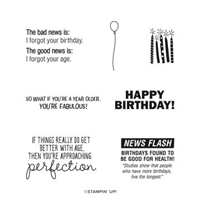
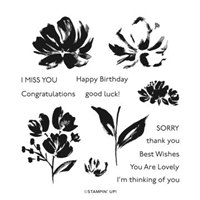
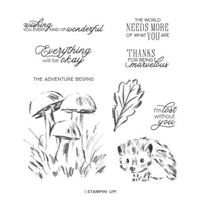
And don’t you just love the sentiment? The mixture of two fonts is gorgeous, and to make things even better, the stamp set is one of the FREE choices as part of Sale-a-Bration until 28th February 2021. The finished size is really good too and will fit plenty of treats inside.

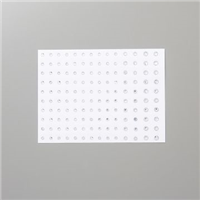
Have you purchased any of the Golden Garden Acetate yet? If not, why not?

Best Wishes,
Suzanne

Colours Used:

Measurements:

  • Cardstock = 81/2 x 111/2 inches
  • Acetate = 51/2 x 12 inches

Scoring:

  • Long side = 4, 51/2, 91/2, 11 inches
  • Short side = 11/2 inches on each side
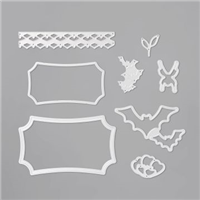
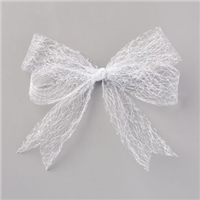
Supplies:

Bermuda Birthday

When I get stuck in a phase of using the same colours, I take a good look at my ink shelves and take five colours that I haven’t used recently and use at least one of them on the next project. I did go through a stage of using Bermuda Bay all the time, it was my colour of choice – it’s also my daughter’s favourite Stampin’ Up! colour.

So with Bermuda Bay chosen, I set out to make a monochrome card. It’s pure coincidence that Bermuda Bay happens to be one of the colour choices in the Oh so Ombre FREE Sale-a-Bration paper, and I course went with my favourite design – the bubbles (as I call them!).

And rest, as they say, is history. The card brought itself together and made a brilliantly monochrome birthday card.

What colour would you have chosen?

Best Wishes,
Suzanne

Colours Used:

Supplies:

Floral Thanks

I first made this box on the day my pre-order from Stampin’ Up! arrived. The grey background on the paper with the bright colours instantly drew me in. I didn’t know what I was going to make, but knew it had to be with that particular pattern. The grey background contrasts beautifully with Coastal Cabana, so that formed the colour theme of my box.

Using Fine Art Floral and some two step stamping, the picture really shines on the box. The colour theme also allowed me to bring out one of my favourite sets in the Annual Catalogue – Playing with Patterns, using both the embellishments and the ribbon.

And the best part? The darker shades on each of the flower heads is the same stamp. It has been designed to work with all three flowers, which I think is pure genius! And the box itself, well as the video shows – this can be made in bulk as it’s easy peasy to put together.

Which colour do you prefer, Coastal Cabana or Real Red?

Best Wishes,
Suzanne

Colours Used:

Measurements:

  • Cardstock = 91/2 x 71/2 inches
  • Designer Series Paper = 6 x 12 inches
  • Cardstock Scrap = 31/4 x 23/4 inches
  • Basic White Scrap = 3 x 21/2 inches

Scoring:

Cardstock:

  • Long Side = 3, 41/2, 71/2, 9 inches
  • Short Side = 11/2 inches

Designer Series Paper

  • Long Side = 51/4 inches on both sides
  • Short Side = 11/2 inches on both sides

Supplies:

Halloween Magic

HalloweenMagic_Pic

This year’s Halloween paper is absolutely gorgeous and whilst Halloween is still almost two months away, I find myself using it again and again (you’ll see it make an appearance in my Birthday Party Live Week). For this project, I wanted to showcase the gorgeous bats and the giant label you get as part of the stamps and dies, so a large box was the perfect solution.

The large bat on this project was the first item I used when I received my Mini Catalogue pre-order, the fact that the dies fit around the Designer Series Paper (DSP) patterns is a great added bonus and I love how these bats look when they’re cut out.

I went quite simple with the box design so that the paper and the decoration could take centre stage. The Metallic Mesh ribbon is perfect for this project with its almost spiderweb appearance – but could be a great addition on Christmas projects too.

Finally, a bit of blends colouring on the label brings it all together. The box is large enough to fit numerous treats – perhaps to give to children out trick treating? Or as a table gift at a Halloween party? What do you think? I hope you like it. #

Best Wishes,
Suzanne

Colours Used:

Measurements:

  • Cardstock = 8 x 11 inches.
  • Designer Series Paper = 6 x 9 inches.

Scoring:

  • Base (Cardstock): 2 inches on all four sides.
  • Lid (Designer Series Paper): 1 inch on all four sides.

Supply List:

Wild Hedgehog

This stamp set was the first one from the Annual Catalogue to make it on my ‘wish’ list. I absolutely love hedgehogs and this one is so cute! I love the sketched nature of the stamp set and the free reign it allows me for art materials – the imagery would suit Watercolour Pencils, Stampin’ Blends, using ink with an Aqua Painter or just left as outline images.

For this particular card, I chose to use Stampin’ Blends as I wanted to play around with the colours and the shading. The image shown is made up of three separate stamps – the mushrooms, the hedgehog and the leaf. Only the mushrooms came with grass as part of the image, but the versatility of my Stampin’ Blends allowed me to replicate under the hedgehog and leaf also – barely noticeable too?

I wanted to keep this card simple to show off the coloured image, so backed it onto a single piece of Just Jade – which I think it absolutely gorgeous. Don’t you agree?

Best Wishes,
Suzanne

Colours Used:

Supply List: