Origami Blooms

You know when you sit down at your craft table with a project in mind, but then something just doesn’t go quite right so you end up with something completely different? Well that’s what happened here, a misjudged measurement meant the project took a very different turn and ended in something else, equally beautiful.

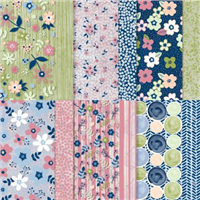
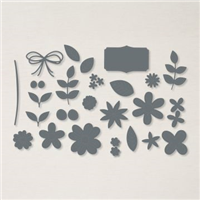
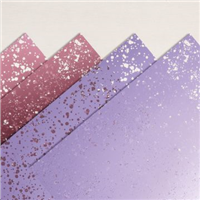
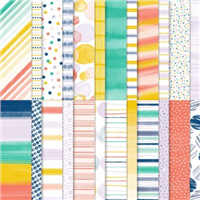
The project gave me the opportunity to use the pierced blooms dies again, which now I have them, I cannot stop using. They’re the perfect addition to any project and coincidentally co-ordinate with the FREE Paper Blooms Designer Series Paper (DSP) that I chose.

Also I’ll let you into a little secret, I personally prefer the version I made in the video, especially because I manage to tie a gorgeous bow on camera!

Have you ever had a project that went wrong, but then you preferred the end result?

Best Wishes,
Suzanne

Colours Used:

Measurements:

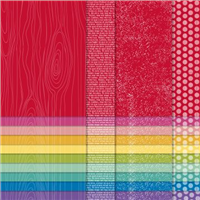
  • Designer Series Paper = 12 x 12 inches
  • Scraps of Petal Pink, Soft Sea Foam, Basic White, Night of Navy, Seaside Spray, Rococo Rose, Old Olive.

Scoring:

  • Side 1 = 3 and 6 inches
  • Side 2 = 41/2 and 71/2 inches
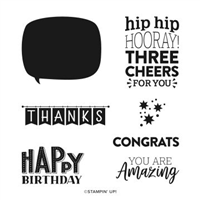
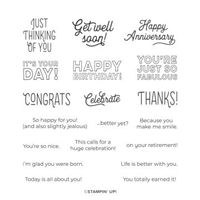
Supplies:

Bright Birthdays

As part of the joining offer during Sale-a-Bration, you can earn a FREE set of Designer Series Paper (DSP). When I say set, I mean 5 PACKETS!!! of yet to be released paper from the upcoming Annual Catalogue in June. That’s right, you can get them ahead of everyone. Even demos can no longer get their hands on these, as the pre-order time period is over. So if you join my team before 28th February 2021, you can earn the paper that made this card.

Of the five packs, I chose to go with the Brights collection. I usually fall into the trap of sticking to the Subtles or the Regals, so took a bit of a lane swerve. I love the colours that I chose, they go together so well; Pacific Point, Gorgeous Grape, Granny Apple Green and Daffodil Delight.

I wanted to match the stamping to the strips in the background, so used the same technique seen yesterday on my Simple Sunday series by using Stampin’ Write markers to colour sections of the sentiment. Which I think stamped rather well!

Have you seen the joining offer and been tempted? Ask me how before it’s too late!

Best Wishes,
Suzanne

Colours Used:

Supplies:

Simple Sunday #13 – Dragonfly Garden

Welcome to my new Sunday series, affectionately known as Simple Sunday! The aim of this series is to showcase projects using minimal supplies, ideal for the beginner crafter or someone new to Stampin’ Up! Each project is a white card base with a 3×3 panel decorated using a single stamp set or die set. This week’s project features a stamp and punch bundle that you can purchase from the January to June 2021 Mini Catalogue.

I absolutely love a punch bundle – there’s nothing better than being able to sit there and mass produce cards / boxes with toppers that include punches. Don’t get me wrong, dies are beautiful, but I find a punch much faster and sometimes time is of the essence!

On this card, I didn’t want to use too many products as that would distract from the simple nature of the series I set out to create, but sometimes the Stampin’ Write Markers are overlooked – especially following the release of the Stampin’ Blends. So I wanted to make sure that new crafters could see that you don’t need everything right away. If you don’t have the inks, you can use the markers instead and they are cost effective to buy in bulk than the ink pads.

For some final dimension on this card, I lifted the dragonfly using dimensionals and coloured in the outline using Wink of Stella to bleed the ink and add some gorgeous sparkle.

What do you think? Are you going to try out the marker ink technique?

Best Wishes,
Suzanne

Colours Used:

Supplies:

Prism Congrats

How amazing is the new Hydrangea Hill Mercury Acetate? I couldn’t wait to get my hands on a pack of it – not only because it contains purple either! The pack contains two different colours, Highland Heather & Rococo Rose, both equally beautiful. My box is made from Highland Heather and during my Facebook Live, I made one using Designer Series Paper (DSP) from the Snail Mail suite.

The box is a prism slider, where the acetate or DSP acts as a ‘wrap’ around the inner card box. It’s a good size and will hold a varying amount of sweet treats or jewellery – perhaps even stationary. Because of the acetate and how stunning it looks, I didn’t need to add much more to get a gorgeous finish to the project.

A quick bow using the Gorgeous Grape sheer ribbon, a couple of flowers from the Hydrangea dies and a sentiment from the ‘You are Amazing’ stamp set. Quick and easy project which showcases the suite perfectly.

Which way did you prefer – acetate or Designer Series Paper?

Best Wishes,
Suzanne

Colours Used:

Measurements:

  • Designer Series Paper = 63/4 x 8 inches
  • Cardstock = 71/2 x 113/4 inches
  • Scraps for stamping.

Scoring:

  • 21/2 inches on all four sides

Supplies:

Fabulous Patterns

Layered cards are my new “go to” when I hit a crafty block, you don’t need much inspiration around you to make one. You just need some nice paper and a sentiment to bring a beautiful card front together. Or as I chose for this card, an excuse to use some paper that I hadn’t used in a while – Playing with Patterns.

I love Playing with Patterns, the paper designs and the rest of the suite are really fun, bright colours that suit a number of happy occasions. In the past, I’ve used it for birthdays and as a card to remind someone how fabulous they are – which is also the sentiment being used today.

After choosing three patterns that I felt would go together best, I layered up the card finishing it off with some resin dots, popping some of them where I felt they lined up with the pattern of the card. You could go one step further here and colour in the sentiment letters, but on this occasion I chose not to.

Are you a fan of layered cards?

Best Wishes,
Suzanne

Colours Used:

Supplies: