Happy Saffron

Welcome to my Butterfly Bouquet spotlight week – this week will feature 7 video tutorials posted back to back to spotlight this early release collection from the 2021-2022 Annual Catalogue. The collection is made up of several components – Stamps, Dies, Designer Series Paper (DSP) and Specialty Paper.

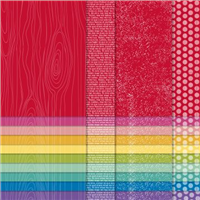
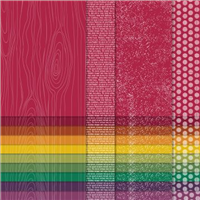
One of the best creative techniques I have learnt whilst stamping / crafting along with others, is the tone on tone technique. I love how just having one colour ink and the matching card stock creates such a subtle, but beautiful decoration on any project. Inspiration for today’s card was taken from the colours featured in the Designer Series Paper (DSP) in the Butterfly Bijou paper stack.

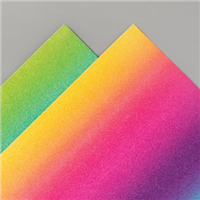
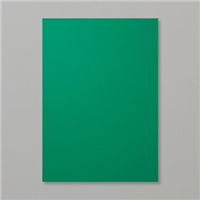
So Saffron is such a gorgeous colour, I’m not a massive fan of yellows but the subtle nature of So Saffron gets past my yellow barrier and I just couldn’t turn down the opportunity to work with that pretty large butterfly or the Natural Touch Specialty Paper.

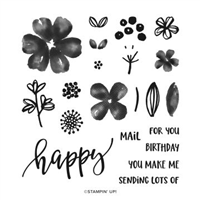
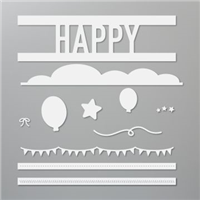
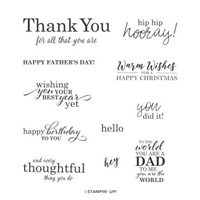
As the Butterfly Brilliance stamp set does not feature any sentiments, I have teamed today’s project with the Pretty Perennials stamp set. I cannot stop using this large happy stamp and fussy cutting it to sit on my projects. You’ll see that it features a few more times this week!

As always, if you like my projects and enjoy my videos, please pop over to my Youtube channel and subscribe to keep up with my crafty makes. You can also find me on Instagram or Facebook.

Best Wishes,
Suzanne

Measurements:

  • So Saffron Cardstock = 57/8 x 81/4 inches
  • Natural Touch Specialty Paper = 3 x 3 inches
  • Basic White Scraps
  • Die Cut Butterfly from Butterfly Bijou Designer Series Paper

Supply List:

Bright Birthdays

As part of the joining offer during Sale-a-Bration, you can earn a FREE set of Designer Series Paper (DSP). When I say set, I mean 5 PACKETS!!! of yet to be released paper from the upcoming Annual Catalogue in June. That’s right, you can get them ahead of everyone. Even demos can no longer get their hands on these, as the pre-order time period is over. So if you join my team before 28th February 2021, you can earn the paper that made this card.

Of the five packs, I chose to go with the Brights collection. I usually fall into the trap of sticking to the Subtles or the Regals, so took a bit of a lane swerve. I love the colours that I chose, they go together so well; Pacific Point, Gorgeous Grape, Granny Apple Green and Daffodil Delight.

I wanted to match the stamping to the strips in the background, so used the same technique seen yesterday on my Simple Sunday series by using Stampin’ Write markers to colour sections of the sentiment. Which I think stamped rather well!

Have you seen the joining offer and been tempted? Ask me how before it’s too late!

Best Wishes,
Suzanne

Colours Used:

Supplies:

Rainbow Stars

RainbowStars_Pic

The Rainbow Glimmer paper is gorgeous, so gorgeous I didn’t know how to use it initially as I didn’t want to cut into it. Technically, I didn’t cut into this as whilst it isn’t a full piece of 12 x 12, it is a full piece underneath the top layer of Whisper White. I wanted to show the rainbow glimmer off in a way that was subtle but pretty at the same time.

Using the Happy dies, I die cut a number of randomly placed stars across the top layer of white. Whilst randomly placing them, I was also making sure I was capturing the full ombre of the Rainbow Glimmer to really show it off – but leaving space for a sentiment to be added.

I kept it quite simple by layering the white onto more white and stamping my sentiment in Magenta Madness for a pop of colour alongside the rainbow. Which I absolutely love! Do you love the Rainbow Glimmer too?

Best wishes,
Suzanne

Colours Used:

Supply List:

Never Ending Birthday

Birthday Party Live – Project #4

Yesterday was my birthday, so I had to make sure the project done on my birthday was a special one. Neverending cards have been around for some time – they’re certainly nothing new BUT I have never tried to make one myself, so what better occasion?

I went for one of my favourite colours for the first one – Cherry Cobbler and teamed it up with the Regals 6″x6″ Designer Series Paper stack. This alone gave some nice texture / difference on the differing sections of the card. To decorate it, I used a multitude of dies available in my collection, stamping any sentiments or images with matching Cherry Cobbler ink.

The second one in the video below was made in exactly the same way, except this time I used Bermuda Bay card stock and Designer Series Paper. Now, I just have to overcome my addiction to making them then sitting there flipping them round and round and round again!

Keeps the children entertained too! Bonus…

** Don’t forget to take part in my Birthday Party Giveaway **

Good Luck!

Best Wishes,
Suzanne

Colours Used:

Measurements:

  • Coloured cardstock (4 pieces) = 6 x 3 inches
  • Whisper White (8 pieces) = 27/8 x 27/8 inches
  • Designer Series Paper (8 pieces) = 23/4 x 23/4
  • Whisper White (10 pieces) = 13/8 x 27/8 inches
  • Designer Series Paper (10 pieces) = 11/4 x 23/4 inches
  • Whisper White (8 pieces) = 11/4 x 11/4 inches

Scoring (cardstock only):

  • Long side (6) = 11/2 inches on both sides

Supply List:

The below supply list only contains the items to make the card without decoration – you can of course use any sets you wish to decorate:

After Eight Teacher

20200705_172401369_iOS

How is already that time of year? Schools are getting ready to break up for the six weeks of summer (for those year groups that have been able to return following Covid-19 closures). For my eldest son, this is his last year in Primary School and he moves onto the scary world that is High School from September. Even though he will have only been back mere weeks, he wanted to get his teachers something to say ‘thank you’ and ‘goodbye’.

Inside these boxes are 10 After Eight chocolates, just the right amount to say thank you to each teacher without overloading them to the point they need a gym membership to work off the extra pounds gained from end of year gifts.

My son chose the Whale of a Time paper stack and a fish pattern in Shaded Spruce – which works well as the After Eight’s choc box is also a dark green. At first we tried stamping and colouring in the apple from Harvest Hellos with Stampin’ Blends, but something just didn’t quite sit right. A quick look on Instagram showed lots of stampers embossing their apples on coloured card stock, which has worked brilliantly on these boxes.

Finished off with a little note inside & a bow of ribbon on the front, these are gorgeous little teacher gifts without breaking the bank. My son can’t wait to give these to his teachers on the last day of school!

Where is this year going?

Best Wishes,
Suzanne

Colours Used:

AfterEight

Measurements:

  • Cardstock = 77/8 x 9 inches.
  • Scrap of cardstock for the stamped apple.

Scoring:

  • Long Side (9″): ½, 21/2, 43/4, 63/4 inches.
  • Short Side (77/8″): ½, 23/4 inches on both sides.

Supply List: