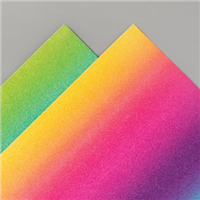
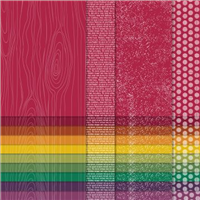
The Rainbow Glimmer paper is gorgeous, so gorgeous I didn’t know how to use it initially as I didn’t want to cut into it. Technically, I didn’t cut into this as whilst it isn’t a full piece of 12 x 12, it is a full piece underneath the top layer of Whisper White. I wanted to show the rainbow glimmer off in a way that was subtle but pretty at the same time.
Using the Happy dies, I die cut a number of randomly placed stars across the top layer of white. Whilst randomly placing them, I was also making sure I was capturing the full ombre of the Rainbow Glimmer to really show it off – but leaving space for a sentiment to be added.
I kept it quite simple by layering the white onto more white and stamping my sentiment in Magenta Madness for a pop of colour alongside the rainbow. Which I absolutely love! Do you love the Rainbow Glimmer too?
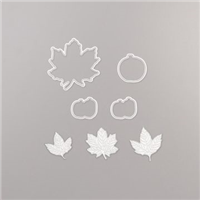
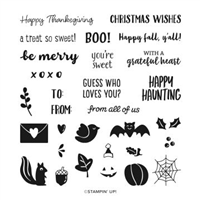
Sometimes a simple card says its all. You don’t need to throw every craft supply at a card for it to get the message across, simplicity is beautiful too. This card demonstrates exactly that! I am in LOVE with the Gathered Leaves dies, the detail they have on them for a small die is absolutely gorgeous especially when teamed with the Brushed Metallic card stock.
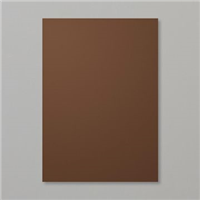
I wanted the gorgeous leaves to take centre stage, so with two sets of leaves I created a border for my sentiment. Layering up with some Early Espresso and onto Thick Whisper White – no ribbons, no embellishments – just the sentiment and the metallic leaves. Beautiful.
The inside of the card has been left blank so when the time comes to gift it to someone, a personalised message can be added. I love it!
It’s the last project of the Birthday Party Live series!! It’s gone by so fast! I thought I would end the series with this cute Kawaii inspired hexagon pencil pot. And you don’t need a lot to make one! Each one turns out differently because of the random stamping technique used to decorate each of the pots.
I chose to keep these ones quite simple, with a cute flower pattern and a face. Both stamps are from the Hippo Happiness stamp set. As you can see from the photograph, the pots are a good size and fit pens / pencils, glue, stamp blocks and many other things.
The Petal Pink version in the video below was done in the same way. All three are glued together with Tombow and helps to keep things together on a craft table. My daughter has stolen the Purple Posy version from me, but I still have the Petal Pink one.
Which colour do you prefer?
Best Wishes, Suzanne
Colours Used:
Measurements:
Biggest Hexagon = 6 x 91/2 inches
Medium Hexagon = 41/4 x 91/2 inches
Smallest Hexagon = 31/2 x 91/2 inches
Scoring:
Biggest Hexagon:
Long Side (91/2″) = 1/2, 2, 31/2, 5, 61/2, 8 inches
Short Side (6″) = 2, 51/2 inches
Medium Hexagon:
Long Side (91/2″) = 1/2, 2, 31/2, 5, 61/2, 8 inches
Short Side (41/2″)= 2, 33/4 inches
Smallest Hexagon:
Long Side (91/2″) = 1/2, 2, 31/2, 5, 61/2, 8 inches
Yesterday was my birthday, so I had to make sure the project done on my birthday was a special one. Neverending cards have been around for some time – they’re certainly nothing new BUT I have never tried to make one myself, so what better occasion?
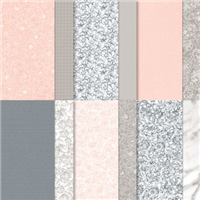
I went for one of my favourite colours for the first one – Cherry Cobbler and teamed it up with the Regals 6″x6″ Designer Series Paper stack. This alone gave some nice texture / difference on the differing sections of the card. To decorate it, I used a multitude of dies available in my collection, stamping any sentiments or images with matching Cherry Cobbler ink.
The second one in the video below was made in exactly the same way, except this time I used Bermuda Bay card stock and Designer Series Paper. Now, I just have to overcome my addiction to making them then sitting there flipping them round and round and round again!
Do you often find that making a masculine card is more difficult than making one for a female recipient? I know I do. I try to set myself a challenge that 1 in every 10 cards must be purposely masculine – this way I’ve always got a masculine card for when I need it. I will confess, it’s no easy challenge.
I start by looking through the Designer Series Paper (DSP) available to me in my collection and pick out any masculine patterns. This particular one is from the Peony Garden DSP and the pattern meant I could let that be the focus of the garden with a simple sentiment to finish it off.
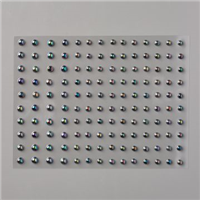
The sentiment is from a great stamp set called ‘Banner Year’, it includes many different images and sentiments to suit all occasions – including the little heart, which is so cute! I then finished it off with my favourite embellishment in this year’s Autumn Winter Catalogue – the iridescent pearls!
What do you think? Do you make many masculine cards?