Halloween Bright

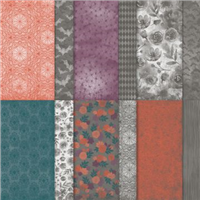
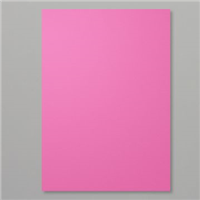
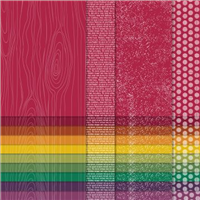
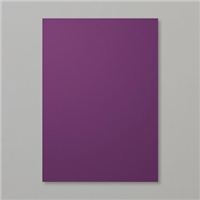
Yes, this paper is making an appearance on my blog again. I just cannot stop using it and find myself reaching for it more than any other Designer Series Paper (DSP). Whilst on this occasion, I was thinking of Halloween – I didn’t want to go full Halloween and wanted to introduce a colour not often linked to the occasion. So I reached for another fave of mine, Magenta Madness. I’ve already had to top up my Magenta Madness cardstock as I’ve used it that much!

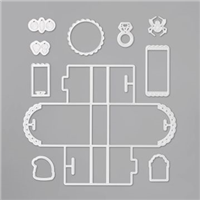
This little pouch was made with trick or treating in mind, we get quite a few visitors each year and always give our little treats or gifts to the children who knock on our door. However, this year we may have to adapt our gifts to suit the restrictions that Covid-19 has brought about – this is where I have introduced the pouch. It is a good size for a pack of small sweeties or a fun size chocolate bar to fit in, but means you can pass them out without others touching them.

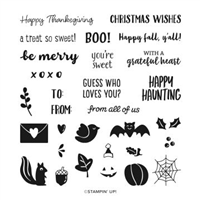
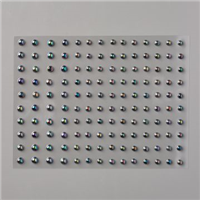
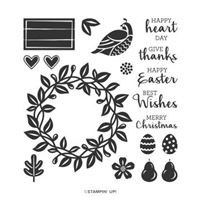
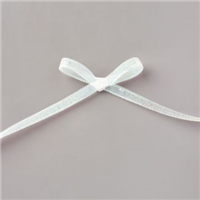
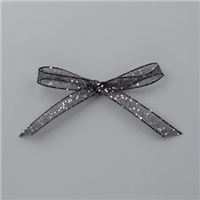
I decorated mine with matching Magenta Madness ribbon and a sentiment from the Banner Year stamp set. The sentiment is such a perfect fit for the pouch and looks pretty finished with the Iridescent Pearls.

Do you do anything for Halloween at all? Or is it perhaps an occasion not celebrated by yourselves?

Best Wishes,
Suzanne

Colours Used:

Measurements:

  • Designer Series Paper = 6 x 6 inches
  • Whisper White = 13/4 x 11/8 inches
  • Magenta Madness scrap piece

Scoring:

  • Side 1 = 3/4, 23/4, 31/2, 51/2 inches
  • Side 2 = 3/4, 5 inches

Supply List:

Hexagonal Thanks

I enjoy making unusual shape boxes – anything that isn’t square or rectangular. I also love making big boxes that can house lots of treats and goodies. This box was meant to be a flat bottomed, tall box with a hexagonal top to it. However, when making the net of my sample, I got the idea to turn both ends into the same.

On my second version, I switched things up a little by using ‘Tis the Season Designer Series Paper to make a Christmas version. The paper is absolutely gorgeous and so many designs to choose from – I went for a Cherry Cobber candy cane pattern.

My most favourite part is the gold cord that I used to tie up the two ends of the box. I’ve always loved cord to tie boxes and bags together, it is so forgiving when tying bows and is easy to untie to gain access to the contents.

Which colour do you prefer – the Night of Navy or Cherry Cobbler?

Best Wishes,
Suzanne

Colours Used:

For Boho Indigo version:

For ‘Tis the Season version:

Measurements:

  • Cardstock = 73/4 x 11 inches
  • Designer Series Paper (6 pieces) = 11/2 x 4 inches

Scoring:

  • Long side (11) = 13/4, 31/2, 51/4, 7, 83/4, 101/2 inches
  • Short side (73/4) = 13/4 inches on both sides

Supply List:

For Boho Indigo version:

For ‘Tis the Season version:

Hexagon Kuwaii

Birthday Party Live – Project #7

It’s the last project of the Birthday Party Live series!! It’s gone by so fast! I thought I would end the series with this cute Kawaii inspired hexagon pencil pot. And you don’t need a lot to make one! Each one turns out differently because of the random stamping technique used to decorate each of the pots.

I chose to keep these ones quite simple, with a cute flower pattern and a face. Both stamps are from the Hippo Happiness stamp set. As you can see from the photograph, the pots are a good size and fit pens / pencils, glue, stamp blocks and many other things.

The Petal Pink version in the video below was done in the same way. All three are glued together with Tombow and helps to keep things together on a craft table. My daughter has stolen the Purple Posy version from me, but I still have the Petal Pink one.

Which colour do you prefer?

Best Wishes,
Suzanne

Colours Used:

Measurements:

  • Biggest Hexagon = 6 x 91/2 inches
  • Medium Hexagon = 41/4 x 91/2 inches
  • Smallest Hexagon = 31/2 x 91/2 inches

Scoring:

  • Biggest Hexagon:
    • Long Side (91/2″) = 1/2, 2, 31/2, 5, 61/2, 8 inches
    • Short Side (6″) = 2, 51/2 inches
  • Medium Hexagon:
    • Long Side (91/2″) = 1/2, 2, 31/2, 5, 61/2, 8 inches
    • Short Side (41/2″)= 2, 33/4 inches
  • Smallest Hexagon:
    • Long Side (91/2″) = 1/2, 2, 31/2, 5, 61/2, 8 inches
    • Short Side (31/2″) = 2, 3 inches

Supply List:

Double Slot Treat Box

Birthday Party Live – Project #6

I love when Stampin’ Up! release dies that make cute little boxes such as the new Little Treat Box dies that are available. They are great when you are struggling to bring a box together for a project and mean you don’t have to work out the measurements before making it. This cute die is meant for a small treat, perhaps a small treat bar or some biscuits?

The treat box size is quite narrow, so does limit the treats that go inside it – however, I adapted mine to have two slots, so double the treats!! Who could say no to that?

To make the project does require two sheets of 6 x 6 Designer Series Paper, but it’s well worth it in my opinion. I chose to make mine from the Regals paper stack, but this could be very easily adapted to suit any occasion. A Christmas Designer Series Paper stack would be perfect with a few stocking filler treats inside – perhaps some chocolate coins?

This project means that there is only one left of my Birthday Party Live Event, I’ll be sad to see it end…

** Don’t forget to take part in my Birthday Party Giveaway **

Good Luck!

Best Wishes,
Suzanne

Colours Used:

Measurements:

  • Designer Series Paper (2 Pieces) = 6 x 6 inches
  • Whisper White = Scrap piece

Supply List:

Blackberry Oval Box

Birthday Party Live – Project #5

So, back in July you saw me make a cylindrical box using the Layering Circles dies – this time I’ve made an oval box using the same method and I think I prefer the oval to the circle! Made in my absolute favourite colour, Blackberry Bliss and decorated with Halloween goodies, this box is a great size. It uses the largest die of the Layering Ovals set to form the template for the lid and the base, and just like the cylinder box the lid sits flush.

In last night’s live stream, I made another in a different colour way but still highlighting the gorgeous Magic in this Night suite from Stampin’ Up! The papers have got to be the best set of Halloween papers I’ve seen Stampin’ Up! do – I know, I say that every year!

Once again, I’ve brought out the iridescent pearls and the glittered organdy ribbon. But they’re so perfect for a Halloween inspired project, that I would be insane not to!! Which one do you prefer? Blackberry Bliss or Pretty Peacock?

** Don’t forget to take part in my Birthday Party Giveaway **

Good Luck!

Best Wishes,
Suzanne

Colours Used:

Measurements:

  • Outer Base Piece = 21/2 x 101/4 inches
  • Inner Base Piece = 23/8 x 11 inches
  • Designer Series Paper Base = 13/4 x 11 inches
  • Lid Piece = 11/4 x 101/4 inches
  • Designer Series Paper Lid = 1/2 x 11 inches
  • Ovals (4) = 27/8 x 33/16 inch Oval Die
  • Designer Series Paper Oval = 23/8 x 35/16 Oval Die

Scoring:

  • Outer Base Piece
    • Short Side (21/2) = 1/2 inch
    • Long Side (101/4) = Every 1/2 inch to the first score line
  • Lid Piece
    • Short Side (11/4) = 1/2 inch
    • Long Side (101/4) = Every 1/2 inch to the first score line

Supply List:

.