Blended Butterflies

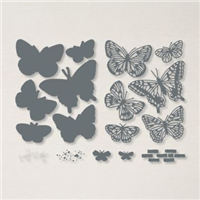
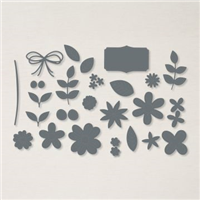
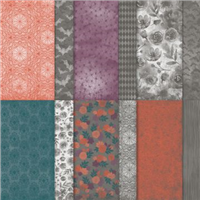
Welcome to my Butterfly Bouquet spotlight week – this week will feature 7 video tutorials posted back to back to spotlight this early release collection from the 2021-2022 Annual Catalogue. The collection is made up of several components – Stamps, Dies, Designer Series Paper (DSP) and Specialty Paper.

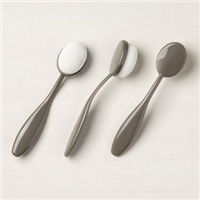
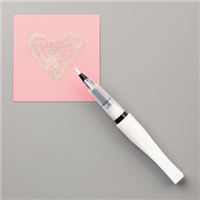
It’s time to get a bit messy / creative as today I have been blending with brushes using a mask. I was inspired by this idea following a craft session making tomorrow’s box. A leftover section of tomorrow’s project works really well as a mask, but needed to be a little bigger so I set off making another. Using the dies from the Brilliant Wings set (which forms part of the Butterfly Bouquet collection), I used the largest butterfly to make my mask – be sure to make it large enough that you don’t risk blending off the mask like I did (see my video).

On Monday, I used my blending brushes with three colour – Magenta Madness, Misty Moonlight & So Saffron, so I stuck to that colour choice for today’s project too. They go together so well, so as they say “why fix what isn’t broken?”. The colours blend beautifully together and get a lovely sharp edge thanks to the mask.

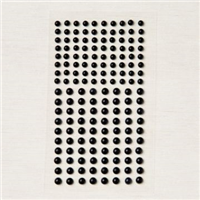
Finishing off the card with some contrast by heat embossing a sentiment in white onto black cardstock gives it a great finish, with some matte black dots of course! I love it…and the best thing about it? You will never get two cards the same because of the blending technique used.

In my video I did a bright version and a more subtle version, which did you prefer?

Best Wishes,
Suzanne

Supply List:

Simple Sunday #11 – In Bloom

Welcome to my new Sunday series, affectionately known as Simple Sunday! The aim of this series is to showcase projects using minimal supplies, ideal for the beginner crafter or someone new to Stampin’ Up! Each project is a white card base with a 3×3 panel decorated using a single stamp set or die set. This week’s project features a stamp and die bundle that you can purchase from the January to June 2021 Mini Catalogue.

My main focus of today’s project was the dies, they are absolutely gorgeous and the pierced detail on the flowers really adds a beautiful touch to your project. The dies contain varying leaf shapes, flowers of varying size plus their middles so you can really build up a bouquet or arrangement or any shape or size.

I stamped my sentiment to the 3×3 panel and then just die cut flowers and leaves in vary colours to build up the floral arrangement. I took my colour inspiration from the co-ordinating Designer Series Paper which you can earn for free with a qualifying £45 purchase.

How gorgeous is the finished card?

Best Wishes,
Suzanne

Colours Used:

Supplies:

Simple Sunday: Snowflake Wishes

Welcome to my new Sunday series, affectionately known as Simple Sunday! The aim of this series is to showcase projects using minimal supplies, ideal for the beginner crafter or someone new to Stampin’ Up! Each project is a white card base with a 3×3 panel decorated using a single stamp set or die set. This weeks project is showcasing the Snowflake Wishes stamp set which is absolutely gorgeous!

For the stamping, I used two different shades of blue and used the ‘Stamp Off’ technique to get the first and second generation shades of each colour – watch my video to see how I do this. My sentiment was stamped first and then 3 differing snowflakes stamped around using this technique.

Once completed, it looked a little ‘flat’ so I grabbed my Wink of Stella and gave each of the snowflakes and the sentiment a touch of glitter – which has made the card so sparkly! I love it.

Best Wishes,
Suzanne

Colours:

Measurements:

  • Card Base = 41/8 x 113/4 inches, scored at 57/8
  • Front Panel = 3 x 3 inches

Supplies:

Halloween Bright

Yes, this paper is making an appearance on my blog again. I just cannot stop using it and find myself reaching for it more than any other Designer Series Paper (DSP). Whilst on this occasion, I was thinking of Halloween – I didn’t want to go full Halloween and wanted to introduce a colour not often linked to the occasion. So I reached for another fave of mine, Magenta Madness. I’ve already had to top up my Magenta Madness cardstock as I’ve used it that much!

This little pouch was made with trick or treating in mind, we get quite a few visitors each year and always give our little treats or gifts to the children who knock on our door. However, this year we may have to adapt our gifts to suit the restrictions that Covid-19 has brought about – this is where I have introduced the pouch. It is a good size for a pack of small sweeties or a fun size chocolate bar to fit in, but means you can pass them out without others touching them.

I decorated mine with matching Magenta Madness ribbon and a sentiment from the Banner Year stamp set. The sentiment is such a perfect fit for the pouch and looks pretty finished with the Iridescent Pearls.

Do you do anything for Halloween at all? Or is it perhaps an occasion not celebrated by yourselves?

Best Wishes,
Suzanne

Colours Used:

Measurements:

  • Designer Series Paper = 6 x 6 inches
  • Whisper White = 13/4 x 11/8 inches
  • Magenta Madness scrap piece

Scoring:

  • Side 1 = 3/4, 23/4, 31/2, 51/2 inches
  • Side 2 = 3/4, 5 inches

Supply List:

InColor Notes Part 2

Birthday Party Live – Project #2

Yesterday evening, the second of my Birthday Party Live events took place over on my Facebook page – if you missed the video, you can view this here on my blog or over on my Youtube challenge. Thank you to those of you who watched and showed your support, it is much appreciated.

During my first live stream, we made 5 incolor notecards and I mentioned a box to house the notecards and their envelopes. Of the five colours to choose from, I went with Magenta Madness – as someone who doesn’t really like pink, this colour is amazing! To keep in with the theme of the cards, I decorated the front in the same design as the cards.

The notecards fit perfectly inside with their envelopes and make the perfect gift or craft fair item. With a switch of the sentiment, they could suit any occasion too!

** Don’t forget to take part in my Birthday Party Giveaway **

Good Luck!

Best Wishes,
Suzanne

Colours Used:

Measurements:

  • Box Base = 91/4 x 63/8 inches
  • Front Image = 3 x 3 inches
  • Sentiment = 13/4 x 11/4 inches

Scoring:

  • Long side (91/4): 1/2, 11/2, 47/8, 57/8
  • Short side (63/8): 1/2, 11/2 (both sides)

Supply List: