Golden Perfection

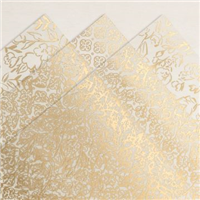
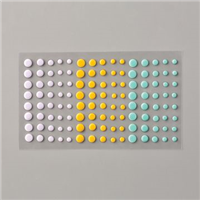
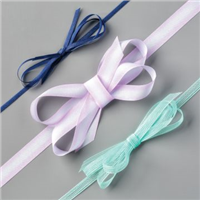
One of my favourite combos is Black and Gold and I absolutely love when I can bring all the co-ordinating items onto a single project like this one – ribbon, embellishments, embossing powder – all matching to really bring the box to light. The acetate acts as a slider on the box for added wow, which I love as it gives it a special something elevating it over any other box you may make.

I don’t get my embossing powders out as often as I should, but powder is the only way to get that gorgeous look to the sentiment. Gold was the theme for the sample I made, but in my video I switched to Silver to show the variety the acetate brings – I’m not sure which one I prefer more!

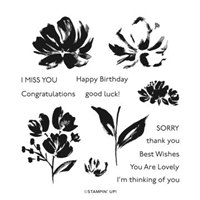
And don’t you just love the sentiment? The mixture of two fonts is gorgeous, and to make things even better, the stamp set is one of the FREE choices as part of Sale-a-Bration until 28th February 2021. The finished size is really good too and will fit plenty of treats inside.

Have you purchased any of the Golden Garden Acetate yet? If not, why not?

Best Wishes,
Suzanne

Colours Used:

Measurements:

  • Cardstock = 81/2 x 111/2 inches
  • Acetate = 51/2 x 12 inches

Scoring:

  • Long side = 4, 51/2, 91/2, 11 inches
  • Short side = 11/2 inches on each side

Supplies:

Floral Thanks

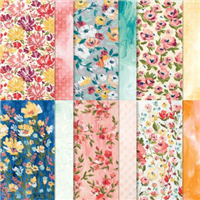
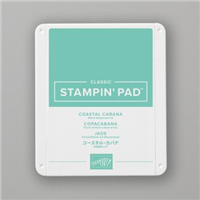
I first made this box on the day my pre-order from Stampin’ Up! arrived. The grey background on the paper with the bright colours instantly drew me in. I didn’t know what I was going to make, but knew it had to be with that particular pattern. The grey background contrasts beautifully with Coastal Cabana, so that formed the colour theme of my box.

Using Fine Art Floral and some two step stamping, the picture really shines on the box. The colour theme also allowed me to bring out one of my favourite sets in the Annual Catalogue – Playing with Patterns, using both the embellishments and the ribbon.

And the best part? The darker shades on each of the flower heads is the same stamp. It has been designed to work with all three flowers, which I think is pure genius! And the box itself, well as the video shows – this can be made in bulk as it’s easy peasy to put together.

Which colour do you prefer, Coastal Cabana or Real Red?

Best Wishes,
Suzanne

Colours Used:

Measurements:

  • Cardstock = 91/2 x 71/2 inches
  • Designer Series Paper = 6 x 12 inches
  • Cardstock Scrap = 31/4 x 23/4 inches
  • Basic White Scrap = 3 x 21/2 inches

Scoring:

Cardstock:

  • Long Side = 3, 41/2, 71/2, 9 inches
  • Short Side = 11/2 inches

Designer Series Paper

  • Long Side = 51/4 inches on both sides
  • Short Side = 11/2 inches on both sides

Supplies:
Pull Toys Love

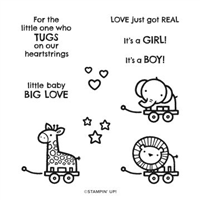
They’re back – the cute little animals from the Baby Pull Toys stamp set are back. It doesn’t take long for me to reach for this stamp set again and again, it’s almost addictive! You have to admit that the little animals are the cutest things ever, and they’re so easy to colour in with Stampin’ Blends.

I took inspiration from the Mini Catalogue and stamped all three animals in a row to form a gorgeous little train. I chose to colour these ones with blends using an assortment of different colours. In my Facebook live yesterday, I put together a baby girl version of the box using Blushing Bridge – but you could of course make this box from any colour (although I personally love the subtles!)

The box is so simple to put together and has the most adorable finish to it. What colour would you choose to make it in?

Best Wishes,
Suzanne

Measurements:

  • Base Cardstock = 8 x 5 inches
  • Lid Cardstock = 41/2 x 71/2 inches
  • Whisper White = 23/4 x 53/4 inches

Scoring:

  • Lid = Score @ 3/4 inch on all four sides
  • Base = Score @ 1 inch on all four sides

Supplies:
Fabulous Year Older

Excited doesn’t even come close – yesterday the new Stampin’ Up! Mini Catalogue for January to June 2021 launched – eek! So in true fashion, today’s project features new product. But this new product isn’t available to just anyone, oh no. The Designer Series Paper shown on the exterior of this box is part of an amazing gift to anyone who joins Stampin’ Up! during Sale-a-Bration. You can read more about this by clicking the button below!

The paper used is Crushed Curry from the Regals collection, but in my video I used Granny Apple Green which is from the Brights Family. Both of them are gorgeous colours to showcase this paper. I kept my box simple, as I want the DSP to really be shown off and take centre stage. With ab bit of white edging, I’m sure you would agree that the pattern of the paper really makes the box look fabulous!

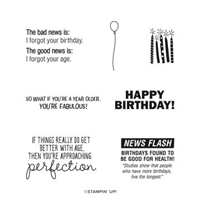
Of course, to finish the box I have used one of my fave stamp sets from the new Mini Catalogue / Sale-a-Bration brochures called ‘Approaching Perfection’. The sentiments are just perfect and I find myself reaching for them again and again, as the jokey nature of the sentiments are my style all over.

Which colour do you prefer from the two showcased? If I made a third box – what colour would you like to see me use?

Best Wishes,
Suzanne

Colours Used:

Measurements:

  • Cardstock = 81/4 x 113/4 inches
  • Whisper White (1 piece) = 41/8 x 25/8 inches
  • Whisper White (2 pieces) = 41/8 x 13/4 inches
  • Whisper White (2 pieces) = 13/4 x 25/8 inches
  • Designer Series Paper (1 piece) = 37/8 x 23/8 inches
  • Designer Series Paper (2 pieces) =23/8 x 11/2 inches
  • Designer Series Paper (2 pieces) =37/8 x 11/2 inches

Scoring:

  • Long side = 2, 47/8, 67/8, 93/4 inches
  • Short side = 2, 61/4 inches (or 2 inches on both sides)

Supplies:
Come back for these after the 5th January and they will be live!
Please note, the paper can only be obtained by joining as a new member!

Well Suited Hooray

Coming up in the new Jan to June Mini Catalogue, there is a suite that is completely male orientated and I can’t get enough of it! I’m absolutely rubbish at making cards for men no matter what the occasion is. So for those of you who like me, you’re in for a great surprise when the catalogue goes live on 5th January.

The suite contains stamps, dies, paper and twine and is perfectly co-ordinated in the usual Stampin’ Up! style. Perfect for any crafter as it means you spend less time finding the ‘right’ shade of any colour.

This tapered top box is made using Night of Navy, but in my Youtube tutorial I have switched things up and used Basic Black – which turned how far better than I ever expected. By doing different colour combos on camera, I’ve learnt to just go with it and has really surprised myself.

The box is decorated with paper from the suite, but with a sentiment from a new stamp set called ‘You are Amazing’ which features in the Mini Catalogue. It fits perfectly into the Stitched Square I chose and sit’s nicely centred on the front. A touch of ribbon and the project looks gorgeous and ready to gift.

Which colour / pattern do you prefer?

Best Wishes,
Suzanne

Colours Used:

Measurements:

  • Cardstock = 81/4 x 111/2 inches
  • Designer Series Paper = 21/2 x 21/2 inches (4 pieces)
  • Designer Series Paper = 21/4 x 21/4 inches (4 pieces)
  • Whisper White Scrap

Scoring:

  • Long Side = 23/4, 51/2, 81/4, 11 inches
  • Short Side = 23/4, 51/2
  • NOTCH the long side = 13/8, 41/8, 67/8, 95/8 inches
  • MARK the Designer Series Paper = 11/4 on all four pieces

Supplies:
Come back for these after the 5th January and they will be live!