

Birthday Party Live – Project #3
At this time of the year, my thoughts turn to Halloween, Bonfire Night, Autumn and Christmas gifts. With Covid-19 having such a large impact on 2020, I have been producing many thank you gifts to my workplace team members for their help and assistance during these unprecedented times.
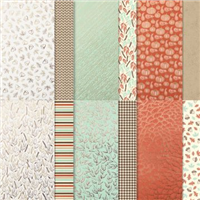
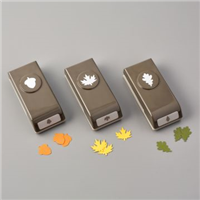
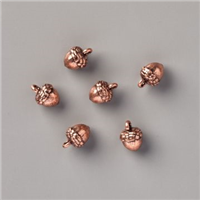
With this in mind, this project is a great gift to pass on your thanks. The outer wrap encases a small wine bottle – this one being a rose wine – and gives the bottle a more personalised touch. I went for an autumnal theme using the Gilded Autumn Designer Series Paper (DSP) and the co-ordinating punch pack. The acorn punch and trinkets are just the cutest things and look gorgeous on the finished project.
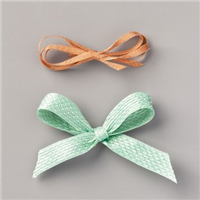
To finish off the bottle and taper the wrap around the neck, I’ve used a piece of metallic ribbon from the Basketweave and Metallic ribbon combo pack – which is utterly gorgeous! Have a go at making one yourself!
** Don’t forget to take part in my Birthday Party Giveaway **
Good Luck!
Best Wishes,
Suzanne
Colours Used:

Measurements:
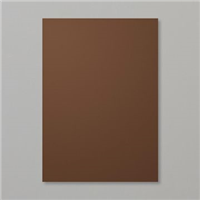
- Cardstock = 7 x 71/4 inches
- Designer Series Paper (6 pieces) = 1 x 41/4 inches
Scoring:
- Long side (71/4) = 2 and 61/2 inches
- Short side (7) = 11/8, 21/4, 33/8, 41/2, 55/8, 63/4 inches
Supply List:


Autumnal Thanks

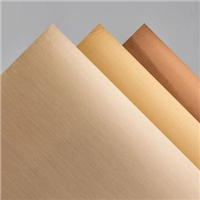
Who loves Autumn and the latter part of the year? I know I do. The colours, the cosy nights, the lead up to Christmas. The Gilded Autumn suite is a great hit of everything that’s gorgeous about that period. With gorgeous copper ribbon, brushed metallics and leafy patterns, the suite screams Autumn before you even read the title of it.
Yesterday, on my Facebook Live, I showed this gorgeous bag. Ideal for thank you gifts, table favours or perhaps treat bags full of goodies. The ribbon keeps the bag closed by wrapping back on itself – no punch holes required. Which means you don’t have to tie / untie it repeatedly either – score!
The bag is a good size too, 6 inches in height by 31/2 wide by 2 inches deep. Plenty of space to fit lots inside. The paper I used on the sample in the photo above is Mint Macaron, with the one in my video made using a Cajun Craze pattern. Both are stunning designs, which is why I chose to showcase them in the way I have.
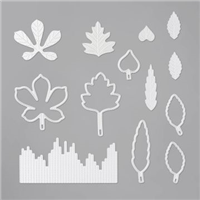
The fussy cut stitched leaf acts as a tag on the bag, whilst acting as decoration, it doesn’t take away from the gorgeous paper being used. The Stitched Leaves dies are utterly gorgeous and you’ll see them make more appearances on my blog!
Best Wishes,
Suzanne
Colours Used:

Measurements:
- Designer Series Paper = 111/2 x 10 inches.
Scoring:
- Long Side (111/2) = 2, 51/2, 71/2 and 11 inches.
- Short side (10) = 2 and 8 inches.
Supply List:
Gradient Blue

Squee! I absolutely LOVE the Artistry Blooms paper – I cannot stop using it! I absolutely love the ombre effect side of the paper and these bags show off the paper in great style.
This bag uses a single strip of glue (for the sentiment), which means they can be stored flat until you’re ready to construct and gift. The paper being double sided means the inside has a gorgeous patterned interior.
I decided to finish mine with a bit of ribbon & a punched out sentiment – take a look at the video to find out more and let me know what you think!
Best Wishes,
Suzanne
Colours Used:

Measurements:
- Designer Series Paper = 6 x 12 inches
Scoring:
- Long Side (12″): 31/2, 5, 7, 81/2
- Short Side (6″): 11/2, 41/2
Supply List:


Mini Wine Bottle Wrap

Ahh, so it’s coming to that time of year when you’re starting to contemplate Bonfire Night, Christmas, Halloween.. Perhaps you’ve already received invites to parties around those times and are wondering what to do for gifts etc? This is a quick idea which can work for all occasions.
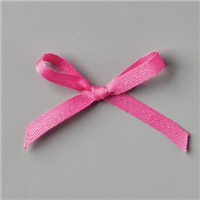
The wrap I have made suits a miniature bottle of wine and rather than being circular, wraps around the bottle in a hexagon style shape allowing panels of Designer Series Paper (DSP) to be displayed beautifully. To follow the shape of the bottle, the top edges are scored and held with a vanilla twine bow.
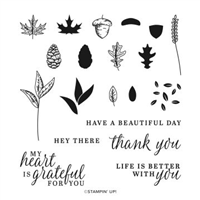
To finish it off, I used a sentiment from the Treat Time stamp set and some bling in the form of Rhinestones – GORGEOUS!
Let me know how you get on with yours.
Best Wishes,
Suzanne
Tutorial
Supply List:


Measurements:
- 7″ x 7 1/4″ piece of card stock.
- 6 pieces of 1″ x 4 1/2″ Designer Series Paper.
- A scrap of card stock for the 1 3/4″ Circle.
- A scrap of card stock for the Darling Label punch and Stamping.
Scoring:
- LONG SIDE: 2″, 61/2″
- SHORT SIDE: 11/8″, 21/4″, 33/8″, 41/2″, 55/8″, 63/4″
Real Red Santa Sack

Ho! Ho! Ho! Could I pull of being Santa? No? Ok, I’ll stop. But what I won’t stop doing is making these GORGEOUS Santa Sacks. In the Autumn / Winter Catalogue this year, the inclusion of the Santa Bags instantly made my eyes light up. They are absolutely adorable and so easy to stamp on.
I decided to change the string on mine so that I could include a co-ordinating ribbon. They are so cute when plumped up with items – a handy size for sweet treats, smellies, bath salts / bombs?
Now I’m off to make some more, I’m addicted!
Best Wishes,
Suzanne
Supply List:


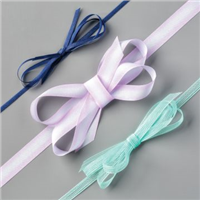
 Mixed Satin Ribbon")
